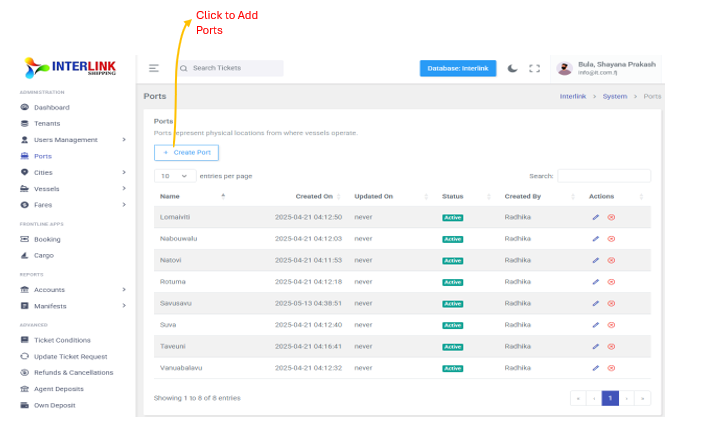
You can access the Ports page by clicking on 'Ports' under the 'Administration' section in the left sidebar. The Ports page allows administrators to manage the physical locations from which vessels operate within the Interlink Shipping platform. Here, you can view, create, edit, and disable port records.

1. Create Port
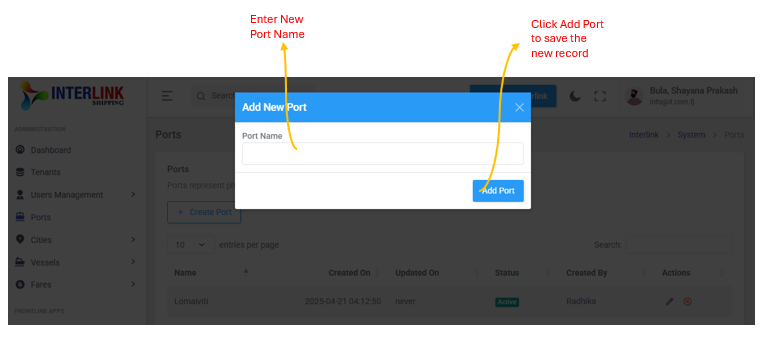
To add a new port, click the "Create Port" button. This will open a modal where you can enter the new port's details, including:
- Port Name: The name of the port.
Click "Add Port" within the modal to save the new record.
2. Ports Table
The main section of the page displays a table listing all existing ports with the following columns:
- Name: The name of the port.
- Created On: The date and time when the port record was created.
- Updated On: The date and time when the port record was last updated.
- Status: Indicates whether the port is `Active` or disabled.
Badge: bg-success(green) for Active. - Created By: The user who created the port record.
- Actions: Contains icons for performing actions on the port record:
 (Edit icon): Click to edit the port's details. This opens an "Update Port" modal.
 (Delete icon): Click to delete the port. This opens a "Delete Port" confirmation modal.
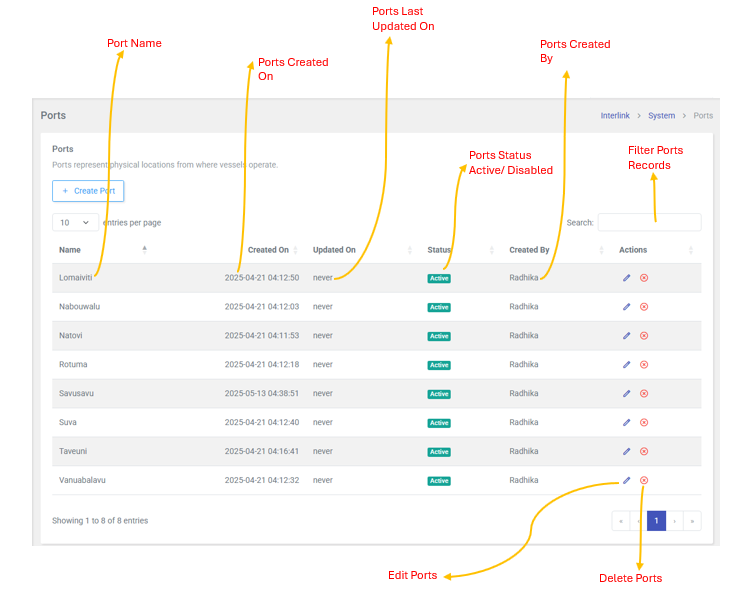
The table also includes pagination controls (e.g., "10 entries per page") and a search bar to filter port records.